
Blue cheese, with its distinctive marbled veins and pungent aroma, is a culinary treasure cherished by cheese enthusiasts around the world. Making blue cheese at home may seem daunting, but with the right guidance and a touch of patience, you can unlock the secrets of this beloved cheese. In this comprehensive guide, we will take you through the step-by-step process of making blue cheese in the comfort of your own kitchen.
Understanding Blue Cheese
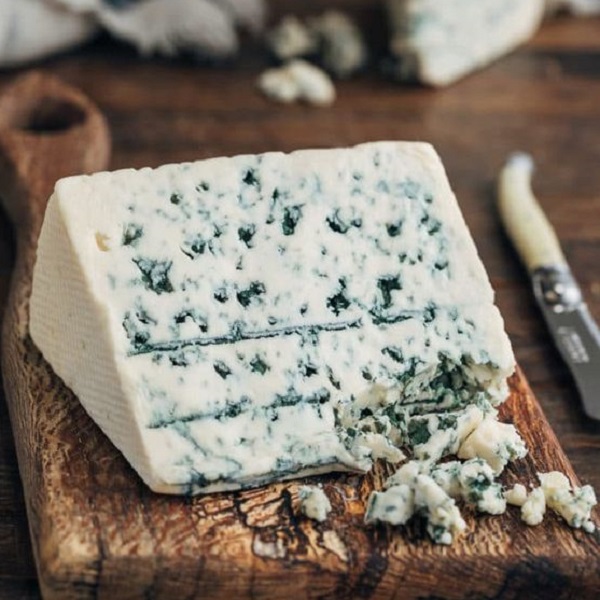
Before we dive into the cheesemaking process, let’s explore what makes blue cheese so unique. Blue cheese is characterized by its blue-green veins, which are a result of the introduction of Penicillium roqueforti mold cultures. These mold cultures thrive in the cheese’s interior, contributing to its signature flavor and aroma.
Blue cheese comes in various styles, each with its own distinct characteristics. Some popular examples include Roquefort, Gorgonzola, and Stilton. The choice of milk, aging period, and mold cultures all influence the final flavor profile of the cheese.
Essential Ingredients and Equipment
To embark on your blue cheese-making journey, you’ll need to gather the following ingredients and equipment:
- Milk: The foundation of any cheese, milk plays a crucial role in blue cheese production. Whole cow’s milk is commonly used, but you can also experiment with sheep’s or goat’s milk for unique flavor variations.
- Cheese Cultures: These beneficial bacteria are responsible for the initial transformation of milk into cheese. Mesophilic cultures are typically used in blue cheese production.
- Rennet: Rennet is an enzyme that coagulates milk, forming curds and whey. It is essential for the cheesemaking process.
- Penicillium Roqueforti: This mold culture is responsible for the blue-green veins and characteristic flavor of blue cheese. You can purchase it in powdered or liquid form.
- Salt: Salt is used for flavoring and preserving the cheese.
- Cheesemaking Equipment: You’ll need a large stainless steel pot, a thermometer, a long knife or curd cutter, a ladle, cheesecloth, a cheese mold, and a draining mat.
Step-by-Step Instructions
Now that you have all the necessary ingredients and equipment, let’s delve into the step-by-step process of making blue cheese:
Step 1: Pasteurizing the Milk
Pasteurization is a crucial step in ensuring the safety of your cheese. Heat the milk in a large stainless steel pot to 145°F (63°C), stirring constantly to prevent scorching. Maintain this temperature for 30 minutes, then cool the milk to 86°F (30°C).
Step 2: Adding Cultures and Rennet
Once the milk has cooled, sprinkle the mesophilic cultures over the surface and let them rehydrate for a few minutes. Gently stir the cultures into the milk. Next, dilute the rennet in a small amount of cool, non-chlorinated water and add it to the milk. Stir gently for about 30 seconds, then cover the pot and let it sit undisturbed for 45-60 minutes.
Step 3: Cutting the Curds
After the resting period, the milk should have formed a firm curd. Use a long knife or curd cutter to cut the curd into 1/2-inch cubes. Allow the curds to rest for 5-10 minutes to expel whey.
Step 4: Cooking the Curds
Slowly heat the curds and whey to 102°F (39°C) over 30 minutes, stirring gently to prevent them from sticking together. Maintain this temperature for another 30 minutes, continuing to stir occasionally.
Step 5: Draining the Curds
Line a colander with cheesecloth and ladle the curds into it. Allow the whey to drain for 15-20 minutes, or until the curds have reached the desired consistency.
Step 6: Salting and Molding
Transfer the curds to a bowl and sprinkle them with salt. Mix gently to distribute the salt evenly. Crumble the Penicillium roqueforti over the curds and mix again.
Place the curds in a cheese mold lined with cheesecloth. Press the curds gently to remove any excess whey. Cover the mold and let it sit at room temperature for 24 hours.
Step 7: Piercing the Cheese
After 24 hours, unmold the cheese and pierce it with a sterilized needle or skewer. This creates channels for air to circulate, promoting the growth of the blue mold.
Step 8: Aging
Place the cheese on a draining mat in a cool, humid environment, such as a cheese cave or a refrigerator with controlled humidity. Turn the cheese daily to ensure even aging.
The aging period for blue cheese can vary depending on the desired flavor and texture. Generally, it takes several weeks to months for the blue mold to develop and the cheese to reach its full potential.
Tips for Success
- Hygiene is Key: Maintain a clean and sanitized working environment to prevent contamination.
- Temperature Control: Monitor the temperature closely throughout the cheesemaking process.
- Patience is a Virtue: Aging is a crucial part of blue cheese production. Allow the cheese ample time to develop its characteristic flavor and texture.
- Experiment with Flavors: Add herbs, spices, or nuts to the curds for unique flavor variations.
Making blue cheese at home is a rewarding experience that allows you to create a culinary masterpiece. By following this step-by-step guide and incorporating your own creative touches, you can craft a blue cheese that rivals the finest artisanal varieties. Remember, practice makes perfect, so don’t be discouraged if your first batch doesn’t turn out exactly as planned. With patience and dedication, you’ll soon be enjoying the fruits of your labor – a delicious, homemade blue cheese that will impress your taste buds and leave you craving more.

Troubleshooting Common Issues
Even with careful attention to detail, you may encounter some challenges during the blue cheese-making process. Here are a few common issues and how to troubleshoot them:
-
No Blue Mold Growth: If you don’t see any blue mold developing after a few weeks, it’s possible that the Penicillium roqueforti wasn’t properly distributed or the aging environment isn’t humid enough. Try increasing the humidity or re-piercing the cheese to encourage mold growth.
-
Unpleasant Ammonia Smell: An ammonia-like odor can sometimes occur in blue cheese, especially during the early stages of aging. This is usually a sign that the cheese is too moist. Increase air circulation around the cheese and reduce the humidity to help dissipate the odor.
-
Bitter Flavor: A bitter taste can develop if the cheese is aged for too long or if the milk quality wasn’t optimal. Taste the cheese regularly and adjust the aging time accordingly.
-
Dry or Crumbly Texture: If the cheese is too dry or crumbly, it may be due to insufficient moisture during aging. Increase the humidity in the aging environment or wrap the cheese in cheesecloth soaked in brine to add moisture.
Serving and Storing Blue Cheese
Once your blue cheese has reached its desired maturity, it’s time to enjoy the fruits of your labor. Blue cheese is incredibly versatile and can be enjoyed in a variety of ways. Here are a few serving and storage tips:
-
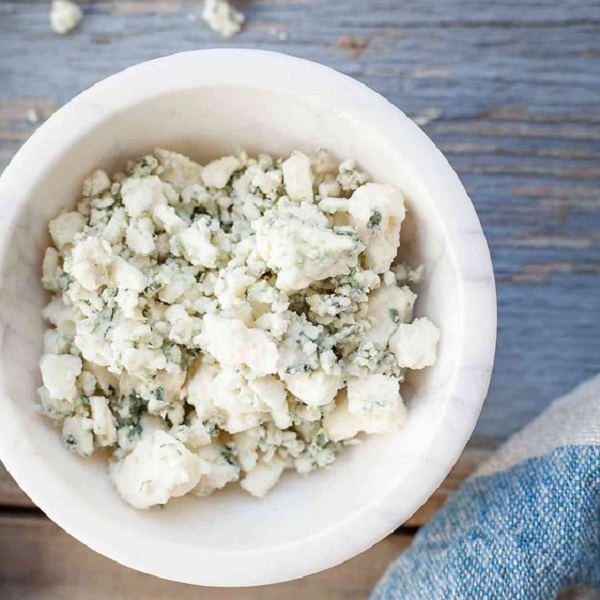
Serving: Crumble blue cheese over salads, pizzas, or pasta dishes for a flavorful punch. Pair it with fruits like pears, figs, or grapes for a sweet and savory combination. Enjoy it with crackers, crusty bread, or as part of a cheese board.
-
Storing: Wrap blue cheese tightly in plastic wrap or aluminum foil to prevent it from drying out. Store it in the refrigerator for up to two weeks.
-
Freezing: You can freeze blue cheese for longer storage. Wrap it tightly in plastic wrap and then in aluminum foil. Freeze for up to three months. Thaw overnight in the refrigerator before using.
Exploring Blue Cheese Variations
Once you’ve mastered the basic cheese recipe, you can start experimenting with different variations to create unique and flavorful cheeses. Here are a few ideas:
-
Milk Variations: Try using sheep’s milk or goat’s milk for a different flavor profile.
-
Flavor Infusions: Add herbs, spices, or nuts to the curds before molding for added complexity.
-
Aging Variations: Experiment with different aging times and conditions to create cheeses with varying textures and flavors.
Conclusion
Blue cheese, with its bold flavors and distinctive marbled appearance, is a testament to the artistry of cheesemaking. By following this comprehensive guide and incorporating your own creative flair, you can craft a blue cheese that is both delicious and uniquely yours.
Remember, cheesemaking is a journey, not a destination. Embrace the process, learn from your experiences, and most importantly, have fun! With dedication and passion, you’ll soon be enjoying the fruits of your labor – a homemade blue cheese that will tantalize your taste buds and leave you craving more.